
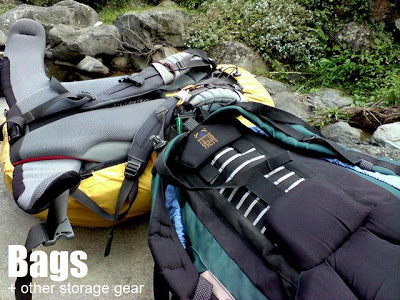
Bags and storage: an overview


“Storage”: part 4 of ‘gears + gadgets’ series
by Gideon Lasco
Of course, hiking isn’t complete without a pack. Together with the tent, this is the most basic of all camping equipment.
DAYHIKES: LIGHT PACKS
Technically speaking, light packs are usually greater than 30L in volume. In simple terms they’re your average backpack, with a main compartment, and a smaller. Variables for light packs include the fabric or material. Questions to ask: “Is it waterproof or water resistant?” “”Does it have space for my reservoir?” Light packs would also come with sternum straps to help support weight. On their sides, mesh compartments may be found to place water bottles or wet clothes.
Actually any backpack will do, but again, some things to consider: (1) will it have enough space (2) is the fabric durable? (3) how will it fare with if stained with mud or plant pigments or exposed to water?
MULTI-DAY C LIMBS: HEAVY PACKS
Heavy packs are the real thing: those large bags that mountaineers carry. It is also known as a ‘frame pack’ or ‘technical pack’. Before my first time to use a heavy pack – Mt. Banahaw in 2003 – I thought it was such a great burden to bear. But actually, our backs are strong and physiologically equipped for weight bearing. Usually heavy packs range between 45-80 liters (in volume). In the Philippnes, as in many countries, internal frame packs are the type commonly used: the frame or structural support comes in the form of metal or plastic strips – sometimes with aluminum stays – that mold to one’s back to provide a good fit. The pack hugs the body, making the hiker more independent and flexible. Sternum straps and hip belts add to the stability and balance. Interestingly, indigenous external frame packs are used by Tau’t Bato tribesmen when they serve as porters in Mt. Mantalingajan in Palawan!
Storage parts of a heavy pack include, of course, the main compartment, the top load, bottom compartment, and sometimes there are side compartments. There may also be a special compartment for your water reservoir. Structural parts, on the other hand, include the aluminum stays, the the lumbar pad which hugs your pelvis. The shoulder strap, of course, is the one you place over your shoulders to carry the pack. It comes with a load lifter that you can pull to adjust the fit of your pack with your back while climbing. You can also clip on some items in your shoulder strap – like a whistle. The shoulder strap is the mainstay of the bag’s suspension system, and is supported by the sternum strap, the hipbelt, and possibly others.
LOAD WEIGHT
Although this is only meant as a guide, the weight of your pack should not exceed about 30% of your body weight (other references say 33% or 40%). Many hikers would actually weigh their pack just before heading off, so they have an idea how heavy their pack is relative to past climbs, and relative to one’s present weight and physical preparedness. Personally, with my 75L pack, I would only bring between 10-15 kgs – around 20%.
TIPS IN ASSEMBLING YOUR PACK
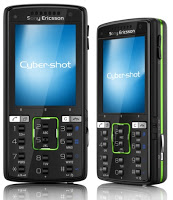
The UP Mountaineers BMC Wiki gives a very handy mnemonic to consider when assembling one’s pack: ABC for Accessibility, Balance, and Compressibility. These three can pertain to the hiker as a whole: if you really need access to something, put it in your pocket (if possible). Many would use beltbags also to place the things they want within reach, without having to open the pack. Personally, I have my camera phone, Ziplocked, in my pocket or beltbag together with a small notebook which I use to jot down my observations and experiences. I also have some trail food at hand. Of course, the reservoir has made drinking very accessible too.
Logically, in your pack you may want to put your essentials at the top load. This would include your first aid kit, rainwear, more trail food, flashlight or headlamp, insect repellant, trail ribbons, among others. Inside the main compartment, an important general principle is keeping your heaviest items close to your back. For climbs of Trail class 1-3, it is more advisable to keep heavy items higher in the pack, to place more weight on your lower back. For climbs of higher Trail classes or those that require balance, place the items lower in the pack, to lower your center of gravity and thus increase your balance. You can also use this strategy if you feel you are unstable. As for compressibility, this is an issue of selecting your equipment well to maximize space. Whenever possible, try not to leave empty spaces. For example, I put some of my food inside my cookset so maximize its use. Don’t bring clothes that are heavy and would take up much space.
For easy access of your stored gears and gadgets, you may want to use color coding, or day coding schemes. Personally, I separate my clothing according the day I would use them. Clear plastic bags (‘cellophane’ in the Visayas and Mindanao) are advised so that you don’t have to open the bags to see what’s inside. Aside from storing things, plastic bags provide waterproofing, which is, as have been often emphasized, very important in the Philippines.
CARRYING YOUR PACK
Internal stability of your heavy pack, as well as external stability of you as a hiker, must be achieved before proceeding with the climb. If you are not stable, you will tire out easily and will make you more prone to slips and falls. Also, if the distribution of weight and effort is uneven, some muscle groups will tire out easily, causing muscle pain. Ideally, your shoulders and upper back carries much of the weight of your pack; sternum straps and hip belts help distribute this on other parts of your body (i.e. chest, lumbar portion of your back). Make sure these straps or fasteners are tight to avoid load shifting.
OTHER STORAGE GEAR
Bags, especially heavy packs, are usually covered with ‘raincovers’. These are made of water-resistant material and help protect your stuff from being wet. One of the more common storage devices used that complements one’s backpack is the reservoir, commonly referred in the Philippines as a ‘bladder’. It contains water, and is usually described in terms of volume (i.e. 2L, 3L). Camelbak, Deuter, Northface all have assault packs with 2-3L bladders. Likewise, packs are now created with a reservoir compartment, with a hole where you can insert the tube. Usually, the valve is within one’s shoulder or back, easily accessible so you can hydrate yourself anytime without having to put down your pack or ask somebody to get your water bottle. As PinoyMountaineer.com becomes more extensive in describing the hiking experience, we will also try to create a separate page for the bladder and other water hydration systems.
There are climbs in which you will require a heavy pack to reach the campsite, but then you will also need a light pack to stage a trip (i.e. summit assault) beyond the campsite. Aware of this, some bag manufacturers make a heavy pack with a detachable part that doubles as a light pack. When camping, you must also create storage for dirty or wet clothes, as well as garbage. “Garbage bags” or large black plastic bags, can be both at supermarkets for around P100 or less per pack. This is a very important thing to bring. Another useful accessory is a “dry pack” or a waterproof bag wheere you can stuff all your valuables. Usually, Ziplocks work very well for cellphones, cameras, and other. Waterproofing will be discussed in greater detail in a separate article.
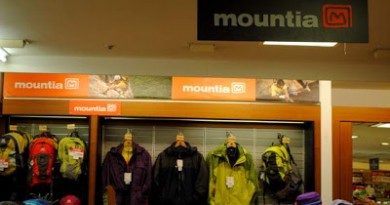
WHERE TO BUY AND HOW MUCH
If you are a beginner, your ordinary backpack can serve as your light pack: there is nothing wrong with this. Later on you may want to purchase a light pack specially built for hiking – with reservoir compartment and all – this would cost anywhere from P1000-4000.
Meanwhile for heavy packs, you really have to buy one. Some mountaineering stores can have one custom-built for you. As in tents, individual preference would come into play in choosing to best volume. For more ‘hardcore’ climbers who self-contain, climb in small groups, or go in 3-day expeditions or longer periods of time, a 75L pack would be suitable whereas for members of mountaineering clubs who climb in large groups and where equipment is shared by the group, a 45L pack would suffice. Many hikers would have two packs depending on the activity.
For daypacks, sporting goods and outdoor stores will offer a variety of choices. Specialty stores such as ROX at the Fort would offer the widest range of heavy packs. Prices will vary with ocally-made brands selling for P3000 and imported brands ranging from P6000-P15000 or more. The more expensive the bag, usually the more elaborate the design in terms of suspension, durability, ventilation, aesthetics, and other variables.
Pictures: (1) Mt. Amuyao near Pat-yay village, April 2008; (2,3) Tau’t Bato boy and porter, Mt. Mantalingajan in Palawan, March 2008.
Leave a Reply
10 Comments on "Bags and storage: an overview"
plengski:
Kahit late na sagutin ko pa din.
Any of the major brands will do basta sundin mo yung guide sa http://www.rei.com/learn/expert-advice/backpack.html
I suggest you bring a 40L+ if Ambangeg trail ka and 60L+ if Akiki trail ka naman.
Conquer yung dala ko mismo sa Akiki ok naman siya. Mga friend ko Sandugo naman at nakaakyat naman siya ng maayos sa Akiki din.
So i guess na sa sayo na yan kung anong magandang bag para sayo base sa guide na pinost ko.
Aldrin
kung mga tipong pang mt. pulag po?ano po recommended nyo na bag? anyone tried the sandugo brands?the big ones?Thanks!!
Agree with Cecil, pack weight should be carried by the hips not the shoulders.
Also, it’s much better to classify packs by capacity (volume) rather than calling it “light packs” or “heavy packs”. Remember, weight is relative to the person carrying it. So it is difficult to say what constitute light and heavy packs.
Very informative site by the way. Keep it up!
Ben
CSI just read your message! Long vacation kasi! Interested ako sa mga hiking gears and accssories mo. My email ad is mcj619@yahoo.com. Maraming Salamat!
@ MC/Sokisok sir benta ko ung mga gamit after akyat dyan, hindi ko na ibabalik dito.. baka interesado ka sir. thanks.